
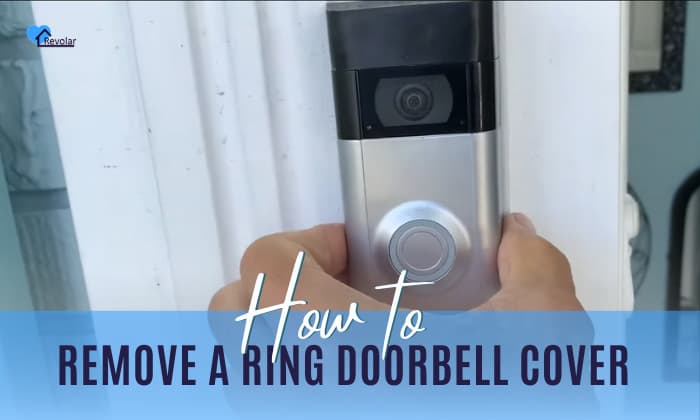
Ring doorbells can sometimes malfunction, which requires you to unmount the Ring doorbell and tinker. Most of the time, a professional can fix the problem of your Ring doorbell, but you can also save money and improve your repairing skills if you are going to do it yourself.
That being said, you have to know the ins and outs of the device to fix the Ring doorbell without damaging it further. This includes how to remove a Ring doorbell cover that exposes the inside of the device.
Table of Contents
Step-by-Step to Remove a Ring Doorbell Cover
There are many reasons why one wants to remove the cover of their Ring doorbell. They remove the Ring doorbell to reset WiFi, charge the battery, or just to find out the cause of the problem.
Before diving into removing the Ring doorbell cover from the wall, you must prepare the special star-shaped screwdriver. This Ring doorbell cover removal tool is included in the Ring doorbell kit.
To open Ring doorbell cover, follow these simple and easy steps:
1. Locate the security screw. The security screw can be found at the bottom of your Ring doorbell.
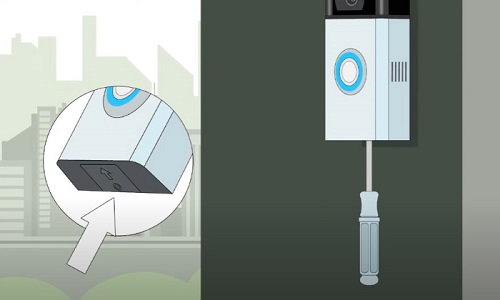
2. Unscrew Ring doorbell’s security screw. With your star-shaped screwdriver, remove the security screw and keep it as you will be reinstalling it for later.
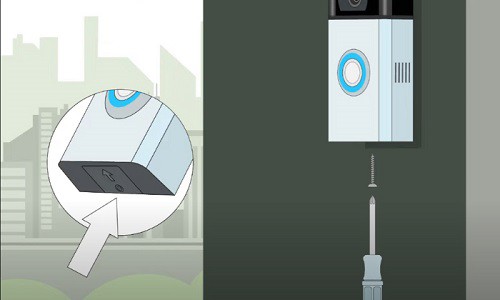
Note: If you have a kit without the tool, you might want to try other types of screwdrivers.
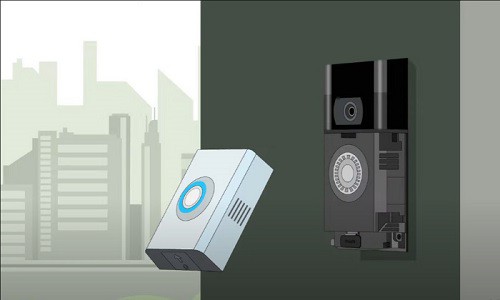
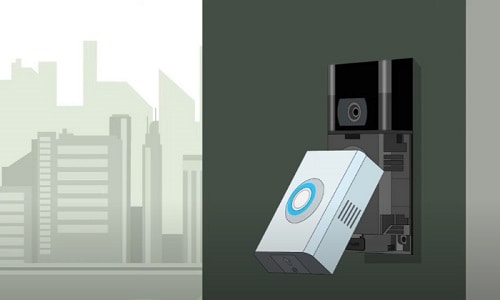
3. Push the bottom of the faceplate. The faceplate should slide off and snap away from the body of the doorbell.
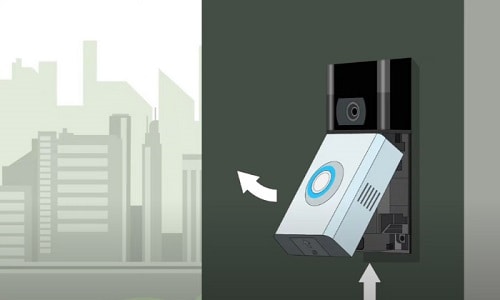
4. Remove the faceplate from the doorbell. In one fluid motion, pull the faceplate away from the doorbell to detach the Ring doorbell cover.
Note: if you need to uninstall the battery of the doorbell and charge it, press the “push” button and slide the battery down to remove it from the doorbell.
You can also refer to this video to remove your Ring doorbell pro, it’s applicable to Ring doorbell 3 and 4, too.
You now know how to take the Ring doorbell off. If you want to place it back, follow these steps:
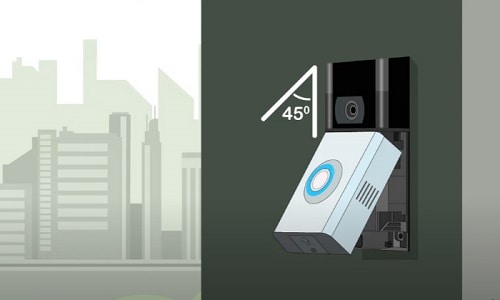
1. Locate the hook and the slot. The faceplate of your doorbell should have a hook on the top and a slot on the doorbell.
2. Hook the faceplate on the slot. Make sure that the faceplate is held at 45 degrees relative to the doorbell and is lined up properly so that the hook can clip inside the slot.
3. Push the bottom part of the faceplate towards the doorbell. You should hear a snap when the faceplate is properly put back into place.

4. Fasten the security screw. Get your special star-shaped screwdriver and insert the security screw at the bottom part of the doorbell.

You now have placed the faceplate back on the doorbell.
Conclusion
Ring doorbells are consumer-friendly due to its simple and easy steps to utilize and troubleshoot them. That is why it is commonly used by clients who want to improve the security all around their homes and businesses.
Knowing how to remove a Ring doorbell cover will help you save money from hiring a professional. You can gain knowledge about your Ring doorbell and other Ring devices just by doing the troubleshooting all by yourself.

I am the last member to join Revolar and might be just the luckiest to work with dedicated people like Teddy and John. Our team has established a process where my only job is writing the best content to deliver incredible ideas and guides.