
To measure the amount of power used inside your home or building, your local electric utility will set up an electric meter in this location. Most people also know it as a “watt/hour” meter. For whatever reason, you may be wondering how to remove electric meter lock?
In most cases, an authorized utility employee or a qualified electrician are the ones permitted to remove an electric meter. Moreover, almost all utilities will ask you to get a permission before breaking seals and removing the meters.
This article guides you on removing a residential meter at about 250V or less for safety reasons. You should not take lock off electric meter that is industrial, commercial, or those having bypass switches without professional help.
Table of Contents
- What You Will Need to Follow This Tutorial
- How to Remove Electric Meter Lock Step By Step Instructions
- Step 1: Find the electric meter’s position.
- Step 2: Check out the meter and its enclosure.
- Step 3: Test to see whether you can remove your meter.
- Step 4: Ask for permission from the local utility to break its seals for removal.
- Step 5: Turn off the building’s power.
- Step 6: Investigate the meter for signs of the building’s connected load.
- Step 7: Cut and break its seal.
- Step 8: Start standing on a sheet of plywood, a rubber mat, or other materials that are non-conductive.
- Step 9: Get rid of the retaining ring (cover) holding this meter in place.
- Step 10: Move the meter in an up-and-down motion.
- Step 11: Make sure the free meter is safe from theft or damages.
- Step 12: Reinstall.
- Summary
What You Will Need to Follow This Tutorial

This an overview of what you need to do to remove an electric meter lock safely:
- Find the electric meter’s position.
- Check out the meter and its enclosure.
- Test to see whether you can remove it.
- Ask for permission from the local utility to break its seals for removal.
- Turn off the building’s power.
- Investigate the meter for signs of the building’s connected load.
- Cut and break its seal.
- Start standing on a sheet of plywood, a rubber mat, or other materials that are non-conductive.
- Get rid of the retaining ring (cover) holding this meter in place.
- Move the meter in an up-and-down motion.
- Make sure the free meter is safe from theft or damages.
- Reinstall.
How to Remove Electric Meter Lock Step By Step Instructions
Follow this step-by-step tutorial for power meter locks removal at your house.
Step 1: Find the electric meter’s position.
In most cases, you will find the electric meter on the outside of your house, but it might also be located inside, close to the electric panel.
If an aerial service lateral is responsible for providing power, following the wires to the apartment will help you see this electric meter’s position.
Step 2: Check out the meter and its enclosure.
An electric meter is usually kept in position by one of the following methods:
- A thin metal ring having a tab and slot. You will see the length of this ring having a shoulder on both sides. It engages the meter’s edge A lip and the meter’s socket/enclosure rim.
Also, it holds this meter tight in the socket. After passing the ring’s tab through this slot, they will place a seal on top for tampering indication.
- A thick metal ring, accompanied by a special type of locked enclosure surrounding the meter’s retaining hardware. This restricts unauthorized people from the meter and its ring removal.
- The meter’s own cover holding the meter’s lip to keep it in position inside the meter enclosure. It functions quite similarly to the two examples above.
Step 3: Test to see whether you can remove your meter.
Check to see if you can remove the meter from its mounting position. If your meter is protected by a simple seal, it will allow you to remove the entire meter.
On the other hand, those secured by special locked enclosures or thick rings do not allow removal without damaging the meter severely or posing a threat of fire, electrocution, or shock. The safest remedy for these types is to contact your local utility.
Step 4: Ask for permission from the local utility to break its seals for removal.
In case the electric meter has a simple seal on for security and you are certain that you will be able to remove it, it is time to notify your utility. You can make a quick phone call to their customer support department.
Keep in mind that you might be asked the reason you want to remove this meter and how long you expect the removal to last, etc. If you determine that it is impossible to remove this meter, get an authorized personnel to have it done.
Step 5: Turn off the building’s power.
As you shut down the power in the entire building, it will help eliminate the meter’s load. Destructive arcing or burning is likely to occur when you withdraw this meter from its closure and during the later installation. This step prevents that.
- Switch off all of the branch circuit breaker handles. Find the switch for Service Disconnection (the circuit breaker with the largest value) in the panel and turn its handle to off as well.
- Get rid of the fuses by unscrewing all of them in 2 to 3 full turns (or more if required). After pulling out the cartridge-type fuses completely, you should note the position of each unit to reinstall them properly later.
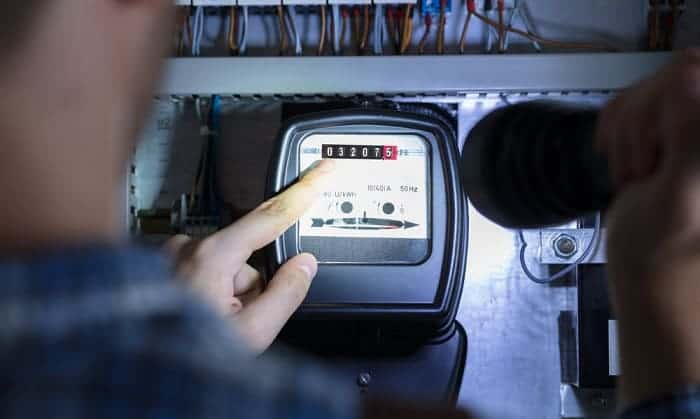
Step 6: Investigate the meter for signs of the building’s connected load.
Make sure that the electric meter is not running, advancing, or spinning at this moment. In case it is, then there is still a connected panel somewhere. I advise checking out the out buildings & garages to remove the load, as in the earlier step.
It is important for the load to be entirely disconnected before you continue.
Even when the load is shed and your meter is not advancing, it does not mean the electrical power is off. Keep in mind that the utility may still be providing electricity that is waiting for usage via the meter into the electric panel.
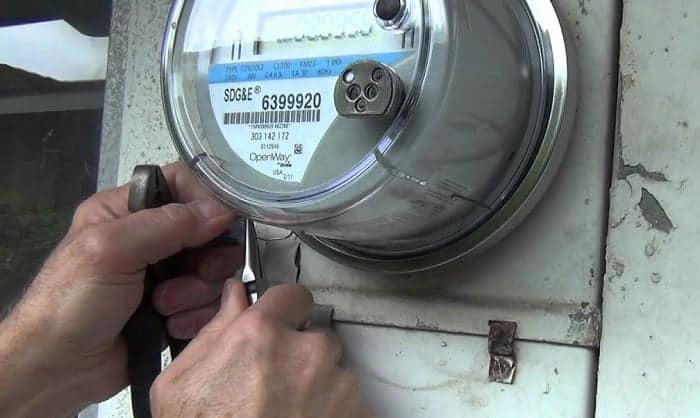
Step 7: Cut and break its seal.
A regular pair of wire cutters can easily cut through this seal and remove it. You should be careful with sharp edges during the seal removal.
Step 8: Start standing on a sheet of plywood, a rubber mat, or other materials that are non-conductive.
Choose to stand on a non-conductive surface from this point as you work with the electric meter. Concrete, asphalt, vegetation, or earth are dangerous since they conduct electricity.
Step 9: Get rid of the retaining ring (cover) holding this meter in place.
In order to remove the ring completely, make a slot lift off the tab, then spread the ring. If it is a cover, you may either lift it up or remove its screws.
Beware of energized parts behind this cover. You should not put your fingers where seeing them is impossible during this removal.
Step 10: Move the meter in an up-and-down motion.
It is best not to add pressure to its base, or reach for its behind. A steady rocking in an up-and-down movement while you pull will free the meter.
Step 11: Make sure the free meter is safe from theft or damages.
Remember that the utility company owns this electric meter, so you are responsible for its loss. Also, you will not want to leave the meter enclosure unattended without adding a “dead front” to secure it from making contact with live parts.
Step 12: Reinstall.
The last step is performed in a reverse order. Make sure the oriented meter is right-side up; the contact blades should be in proper alignment with the contact jaws of its enclosure; and there must be enough applied pressure to the front while you rock it in.
Check out this video for more information on removing electric meter lock ring:
Summary
That is how you can remove electric meter lock ring on your own with some simple tools, knowledge, and side tips. As long as you are careful during the process, I believe you will not make mistakes or accidentally put yourself at risk.
I hope the provided information in this article is interesting and helpful enough for you to share it with friends and family. Do not hesitate to contact us for further information about electric meter lock removal, and share your tips on how to remove electric meter lock. Thank you for reading.
Read more: Tips to remove the electric meter tamper tag.

I am the last member to join Revolar and might be just the luckiest to work with dedicated people like Teddy and John. Our team has established a process where my only job is writing the best content to deliver incredible ideas and guides.