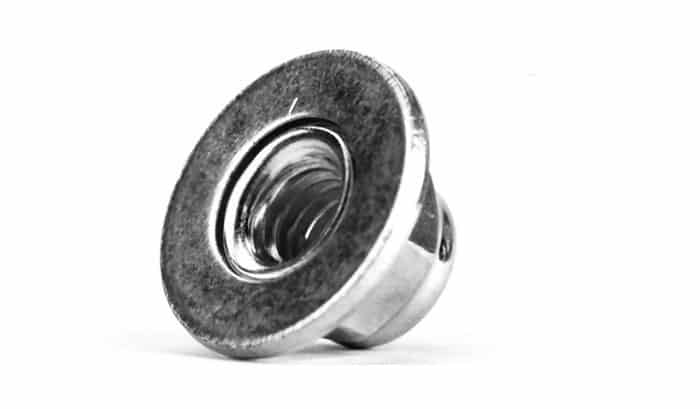
A lock nut is a small component that plays an essential role in device assembly. It often comes in a bundle at a low price, available both online and in-store. However, not everyone knows how to install a lock nut properly on their own.
From our perspective, the process of installing a lock nut is straightforward to handle, even if you have no experience in this field. With the help of our detailed guide, you will finish putting a nut in the correct position before you realize it.
Table of Contents
What Is a Lock Nut?
A lock nut is included in a locking mechanism to protect against vibration or torque for unwanted access. This type of nut is a threaded fastener installed inside the lock, sometimes by itself or together with other components.
However, we need to tighten our lock nuts properly, especially for devices that vibrate significantly when operating. For instance, make it a habit to check your washing machines, lawnmowers, or garbage disposals for loose lock nuts.
Also, extreme weather conditions are another reason for a loose nut. Therefore, frequently checking and knowing properly lock nut tightening are crucial.
Step By Step Instructions
Once you begin this procedure locking nut installation, you will trust our words on how easy it goes. It does not require complex tools or consume much of your time, so you can apply our instructions anytime possible.
Step 1: Choose suitable lock nuts
Due to various applications, many lock nuts are available for use.
- A lock nut with nylon inserts – They are also called a locking nut or self-locking nut. It is a popular locking torque nut that prevents vibration and frequent use loosening.
- Bearing lock nuts – These nuts are applicable in automotive and agriculture machines since they can handle strong rotation and vibration. To install this kind of nut, we need a socket or a spanner wrench.
- Jam nuts – There should be two jam nuts to make one certain joint point. It can also prevent loosening caused by vibration. It suits daily use but is not preferable in engine assembly with a high tension load or other essential applications.
You need to buy a bulk of common-sized lock nuts along with matching plan washers. Choose the type that works the best for your current requirements.
Step 2: Gather tools for lock nut installation
- Lock nuts and plain washers
- A lock nut wrench
Step 3: Get rid of old nuts
The first thing to do is remove all the old nuts that no longer work for securing your device. Those nuts might show sight of rust and crack.
Identify those problem nuts, then get rid of them using a standard-sized wrench.
Step 4: Install new ones
Next, carefully find the correct position to insert your lock nuts and tighten them with a moderate force.
- Find the threaded end of your stud or bolt to place the plain washer over.
- Next, thread this replacement nut onto the bolt/stud with your hand until you sense its nylon insert causing resistance.
- Use the wrench to tighten this lock nut in a clockwise direction.
If you can access the bolt head, we advise taking another identical wrench to keep it in position while you tighten the nut. Or, you can hold the piece with your fingers while tightening.
And if the resistance is strong during tightening, you can loosen the nut and redo it again.
Note: Please avoid cross-heading the lock nuts to avoid damaging the bolt and the nuts altogether.
Summary
That was our step-by-step instructions on how to install a lock nut in the fastest and easiest way possible for everyone to follow. We hope the information provided here will be helpful for your next installation of a locking nut.
So what is your opinion about this article explaining how you can install a lock nut? Let us know in the comment section below. Also, do not forget to share it with others via social media.
Thank you for reading!

I am the last member to join Revolar and might be just the luckiest to work with dedicated people like Teddy and John. Our team has established a process where my only job is writing the best content to deliver incredible ideas and guides.


