
We all have our important documents or items we need to keep in a space away from burglars’ access.
Unlike traditional safes, hidden floor safes are discreet and can be hidden under carpets or furniture. This makes them less likely to be accessed. So, do you want to have an excellent way to secure your valuables?
In this guide, we’ll walk you through how to install a floor safe for home valuables.
Table of Contents
A Step-By-Step Guide on How to Install a Floor Safe
This is how to secure a safe to the floor, whether a wooden floor or a concrete one.
Step 1: Choose the Right Location
Remember that selecting the location for your floor safe is an integral step. You need to follow certain factors before proceeding with the installation process.
- Accessibility – The first aspect to keep in mind is accessibility. Ensure you can easily access the safe’s door even when it’s hidden.
- Concealment method – Next, you need to consider the concealment, so opt for a spot discreetly covered with a rug or furniture.
- For cement floors – Then, you need to ask yourself whether the area has structural integrity. Preferably, choose a room with a solid concrete floor, as floor safes require anchoring to the concrete for security. Also, ensure the floor area is waterproof and free from electric conduit.
For wooden floors – Finding a spot free from infestation or water access would be best. You do not want your items to get ruined by natural elements.
Step 2: Prepare the Area
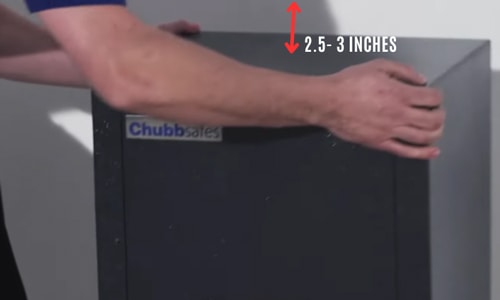
The second step you need to make is to clear the area where you plan to have the safes installed. Place the safe where you want it installed, and make sure it’s at least 2.5- 3 inches away from the wall).
You may need to remove a section of carpet, tile, or other flooring materials.
Step 3: Gather All the Tools
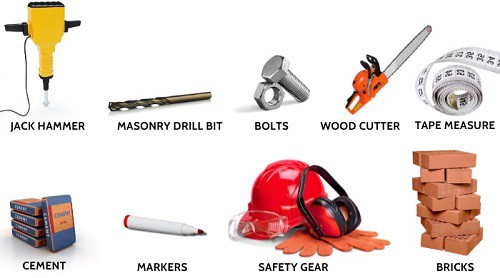
Before you begin, gather the following tools and materials:
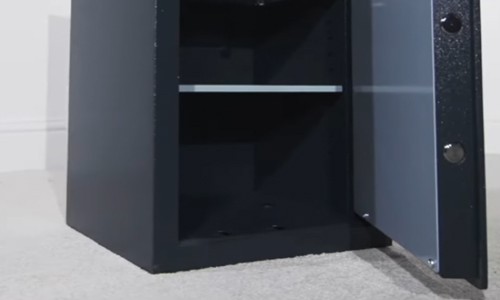
- Floor Safe: Choose a high-quality floor safe that suits your needs. Floor safes come in various sizes and styles, so select one that fits your valuables and can be easily concealed.
- Jack hammer (for concrete floor)
- Masonry Drill Bit: For drilling anchor holes into the concrete.
- Anchors and Bolts: Secure the safe to the concrete floor.
- Wood cutter (for wooden floor)
- Level: To ensure the safe is installed evenly.
- Tape Measure: For precise measurements.
- Markers/chalks
- Safety Gear: Wear safety goggles, gloves, and a dust mask when working with concrete.
- Cement
- Bricks
Step 4: Mark and Cut the Area
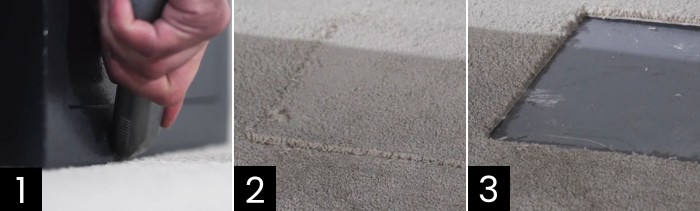
Using the safe’s dimensions and your chosen location as a guide, mark the outline of the safe on the concrete floor/wooden floor.
Then, you want to draw a larger area, with parallel lines 2 inches away from the original outline/dimensions of the safe. Those are the lines (red) for you to cut the floor.
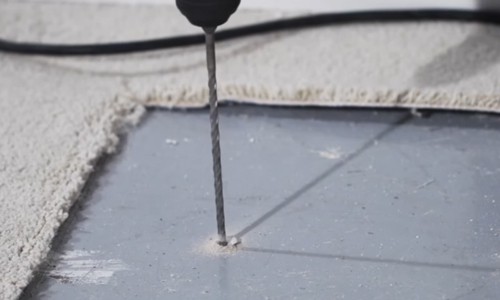
- For concrete floor: Drill holes in the four corners of the outline so you can easily cut the concrete off.
Then, use a jack hammer to cut the area border by the bigger outline. Follow safety precautions and wear appropriate gear to protect yourself from dust and debris.
- For wooden floors: Use the wood cutter to cut clean and straight lines as drawn to creat the hole for your safe.
Step 5: Position the Safe
Lower the safe into the hole you’ve created, ensuring it sits evenly and securely. Use a level to ensure it’s perfectly horizontal.
Pro Tip:
- Get a piece of plywood to make a template. Its total length should be similar to the depth of your safe with the top on.
That way, you will have to stop using a tape measure that may seem inaccurate, provided that you have an uneven dug surface at the bottom.
- For wooden floors, you do not need to measure the depth, as you will usually get a hollow spot. It’s better to have a small safe rather than a large floor safe on a wooden floor. With that, you need to install a floor safe between joists rather than breaking them.
Step 6: Secure the Safe
Take a couple of bricks or pavers. Then, set them down at the bottom. Use your template to make sure that it is in the right depth. This will prevent your safety from sinking, especially after pouring your cement.
This is how you level the sides of the safe in concrete:
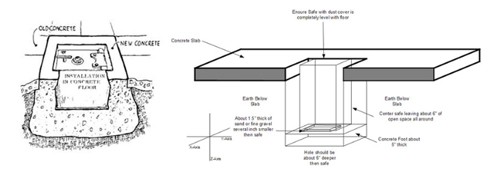
Step 7: Conceal and Finish
Make sure when mixing cement, make the consistency a little wet so it will be easier for you to pour it down. It will also quickly sip into the sides of the safe.
Once the safe is securely in place, conceal it with a rug, piece of furniture, or any suitable cover. Make sure it’s clear that there’s a safe hidden beneath.
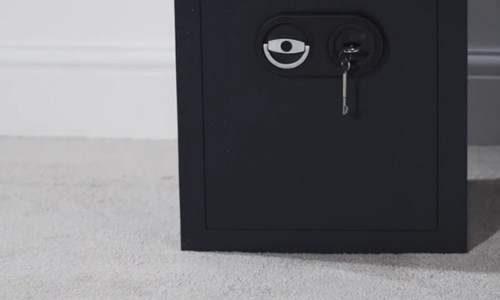
Step 8: Test and Set a Code
Test the safe’s lock to ensure it functions correctly. Set a secure code that only you will remember, and keep a record of it in a safe place.
Conclusion
Installing a floor safe is a practical and discreet way to protect your valuables from theft or damage. Following this step-by-step guide on how to install a floor safe, you can ensure your floor safe is securely installed and ready to safeguard your most cherished possessions.
Remember that a floor safe is only as secure as its installation, so take your time and ensure it’s done correctly.

I am the last member to join Revolar and might be just the luckiest to work with dedicated people like Teddy and John. Our team has established a process where my only job is writing the best content to deliver incredible ideas and guides.