
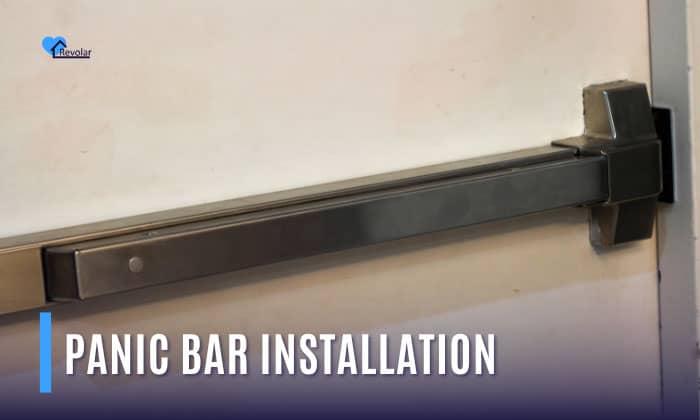
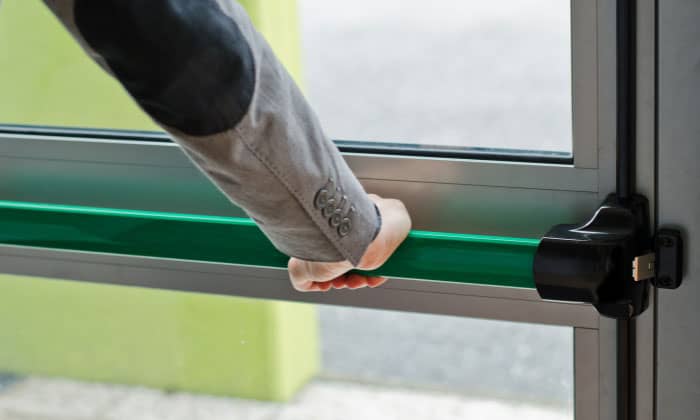
An essential component of emergency exit systems is the panic bar. This device saves lives during crises by providing a quick and easy escape route.
Panic bars work on a simple latching system, allowing for easy operation even during panic or distress.
Installing a panic bar helps rapid evacuation, minimize the risk of injury, and ensure compliance with safety regulations. In this article, we will guide you through everything you need to know about Panic bar installation.
Table of Contents
- What is a Panic Bar and How Does It Work?
- Importance of Panic Bars
- Features of Panic Bars
- Benefits of Panic Bar Installation
- Types of Panic Bars
- How to Choose the Perfect Panic Bar for Your Property
- Process of Installing Panic Bars
- Installation Best Practices
- DIY vs. Professional Installation
- Panic Bar Maintenance and Troubleshooting
- Panic Bar Installation Costs
- Frequently Asked Questions
- Conclusion
What is a Panic Bar and How Does It Work?

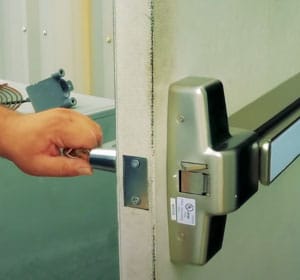
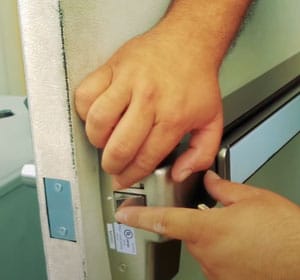
A Panic bar is often called a crash bar or panic device, which unlocks a door quickly. Its main function is to follow life safety rules on a glass door or any type of door.
Panic bars have a metal bar that is spring-loaded and placed horizontally inside a door. he push bar door lock mechanism causes the door to unlock when it is pressed or activated. Thanks to this unlocking mechanism, the door opens outward easily from the inside, creating a clear escape route.
Importance of Panic Bars
The importance of panic bars lies in the following aspects:
- Panic bars allow people to evacuate without quickly finding and managing typical door knobs or locks.
- Panic bars prevent stampedes by offering a wide and easily accessible exit.
- Compliance with Building Codes and Regulations to avoid penalties and legal issues.
- Individuals with disabilities or limited physical strength can efficiently operate them.
- They prevent entry from the outside without proper access control mechanisms.
Features of Panic Bars
1. Horizontal Bars
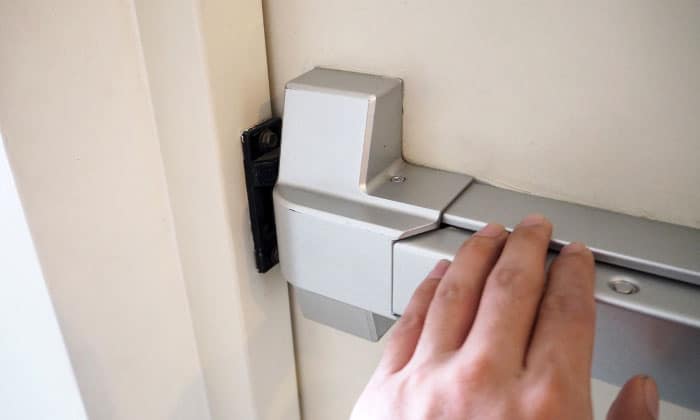
Panic bars feature a horizontal bar that spans the width of the door. This bar is pushed to activate the mechanism, enabling easy activation with a simple push.
2. Push or Touch-sensitive Activation
Some models may have touch-sensitive activation, where a light touch or pressure on the bar triggers the release mechanism.
3. Fail-safe Mechanism
Panic bars often incorporate a fail-safe mechanism that allows the door to open quickly in an emergency, even if it is locked outside.
4. Fire-Rated Options
Panic bars can be fire-rated and designed to withstand fire for a specified period. Fire-rated panic bars help prevent the spread of fire and smoke by maintaining the integrity of the door.
5. Durability and Sturdiness
Panic bars are made from robust materials like steel, aluminum, or stainless steel, ensuring durability and longevity.
6. Compatibility with Various Door Types
Panic bars come in various configurations and sizes, such as single, double, glass, and metal doors, catering to specific needs and aesthetic preferences.
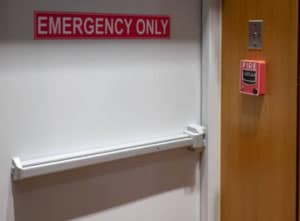
7. Visual Indicators and Signage
Panic bars often feature visual indicators such as illuminated exit signs or LED lights to mark the location of emergency exits.
Benefits of Panic Bar Installation
Install a panic bar to improve any building’s safety and security system, especially on the following:
- Rapid Evacuation – Residents can evacuate the building quickly by pushing against the panic bar on double doors.
- Compliance with Safety Regulations- Building and safety regulations frequently call for a panic bar door lock, which lowers the possibility of legal installing panic bear repercussions.
- Clear Exit Pathways- An outdoor panic bar ensures doors open outward, which helps create clear departure pathways in the exterior gate.
- Enhanced Security- A panic bar also increases a building’s security. This can prevent unwanted people from entering the building while allowing residents to leave the area swiftly in an emergency.
Types of Panic Bars
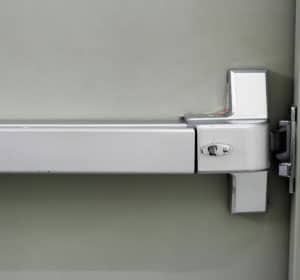
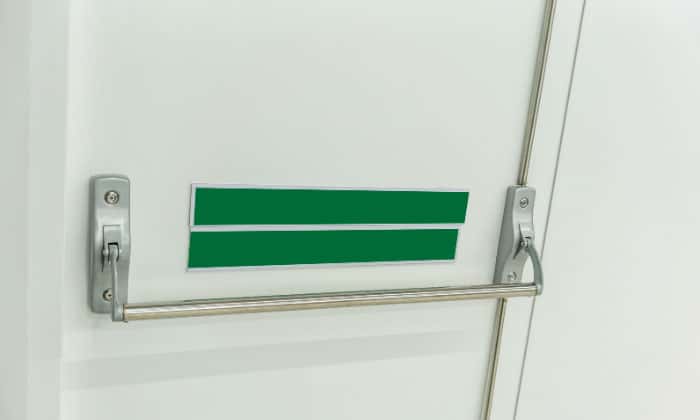
1. Rim Panic Devices
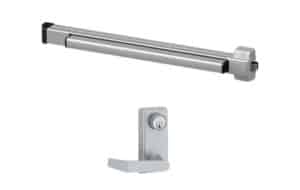
A common panic bar is the rim exit device, which is surface-mounted on single doors or doors with a small stile. It features a horizontal bar that, when pressed, allows easy exit by retracting the latch.
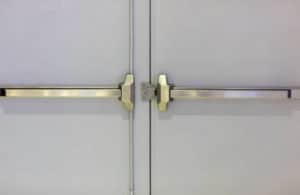
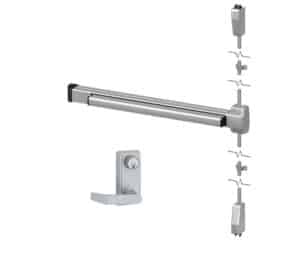
2. Vertical Rod Panic Devices

These mechanisms are frequently employed on double doors or doors with a wide stile. Pushing the panic bar causes the rods to retract, releasing the door for a speedy escape.
3. Mortise Panic Devices
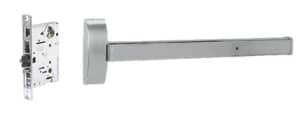
These are recessed into the door edge, providing a streamlined look. They are often used in professional settings for a more discreet appearance with features such as locking options and key control.
4. Concealed Vertical Rod Panic Devices
These are discreet and hidden inside the door and frame. They are commonly used in aesthetically important settings like upscale businesses or structures.
How to Choose the Perfect Panic Bar for Your Property
Door type, installation instructions, security needs, and aesthetic preferences influence panic bar selection.
Panic hardware is required by the National Fire Protection Agency and International Building Code for buildings with occupancy loads of 50 or more people and venues intended for gatherings, education, or high-risk activities.
For instance, a Schlage panic bar is highly preferred. The Schlage 672 Series request-to-exit push bars are designed to allow for quick and easy exit from a building when installed according to local codes with an electronic locking device.
Process of Installing Panic Bars
Here is a quick and simple step-by-step guide on installing panic bars and improving your property’s security. Alternatively, you can follow the tutorial video on installing panic bars while following through the steps.
To understand the panic bar hardware, here’s a parts diagram of a panic bar to familiarize yourself before installation.
Step 1. Examine the door and the frame.
Check the door and frame to ensure they are in good shape and suitable for installing panic bars. Examine the structure for any defects or obstacles that might interfere with the installation.
Step 2. Prepare The Materials and Equipment.
Gather all the necessary materials before beginning the installation.
- A drill
- Screws
- Measuring tap
- Template
- Screwdriver
- The panic door hardware kit
Step 3. Install The Handle Lever.
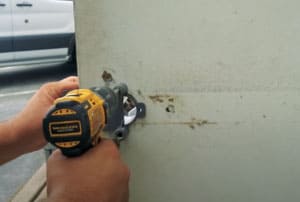
Ensure enough holes in the door for the posts holding the door handles. If not, you must drill fresh holes and use a jig to mark the holes.
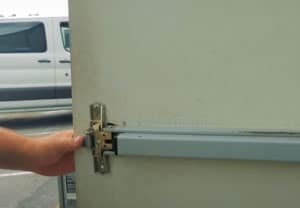
Step 4. Install the Exit Trim
The bar is mounted on the external trim, so you must first attach the push bar’s external trim to the door.
Screw it in after adjusting it to the location where the bar handle rests. Make sure that it is tight enough.
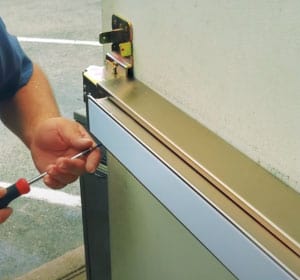
Step 5. Modify the Position of the Push Bar

When installing an exit device, it is important to properly adjust the middle post connected to the exterior trim.
Use the screw on the bar to ensure the correct alignment of the mounting height of the middle post. Then, securely fasten all the screws into their designated holes.
Step 6. Set up the End Cap
Firmly attach the end cap and drill holes in the door to secure the end cap using screws. This ensures a successful installation when the end cover is securely fastened to the push bar’s end.
Step 7. Attach the Cover Plate
Next, position the plate where the latch would typically be located. Align it properly and use screws to affix the cover plate in place firmly. This will add a finished and aesthetically pleasing touch.
Step 8. Install the Push Bar Head
Lastly, securely attach the push bar head by pressing it onto the starting point and then screwing it tightly onto the bar. This ensures the head is firmly fixed.
Installation Best Practices
Here are some tips and tricks for efficient and safe panic bars installation.
- Read the manufacturer’s guidelines.
- Use the proper tools and hardware.
- Test fit components before final installation.
- Pay close attention to the height of the panic bar on the door and the alignment.
- Lay out all the panic bar components and label them according to positions or steps in the installation process.
- Use a template or jig to mark the hole positions on the door accurately.
- Double-check screw tightness.
- Clean up after installation.
DIY vs. Professional Installation
You can install panic bars yourself (DIY), but hiring professionals is best for a flawless and compliant installation.
They have the skills, knowledge, and ensure compliance with building codes and safety regulations. Professionals also offer warranties on their workmanship, providing added assurance.
Panic Bar Maintenance and Troubleshooting
Here are some pointers for maintaining and troubleshooting panic bars:
- Sticky or tough operation- Take apart a panic bar and inspect the mechanism for any obstructions or debris, clean the affected regions, and, if necessary, add lubrication.
- Loose screws or fittings- Tighten loose screws or fittings carefully to ensure a secure connection. Excessive tightness can damage the components.
- Misalignment- Check the alignment of the mounting brackets and make any necessary changes.
- Stuck or Jammed Latch- Inspect the panic bar’s latch for debris and ensure the latch and strike plate are appropriately positioned.
Panic Bar Installation Costs
Here are the typical costs of installing three of the most common emergency push bars.
| Type of Panic Bar | Professional Installation | Local Expert Locksmith | DIY Estimated Cost |
| High-end Vertical Rod Panic Bar | $4100 | $800 | $350 |
| Mortise Panic Bar | $2500 | $800 | Not recommended for DIY. |
| Rim Panic Bar | $1700 | $500 | Not recommended for DIY. |
- Factors Affecting Bar Installation Cost
Several factors can influence the cost of an exit door installation. Like the panic bar’s type and model, the installation’s complexity, and additional modifications to the door or frame.
Additionally, on the location, like local labor rates, availability of skilled installers, and regional pricing trends. It’s important to note that locksmiths, security companies, or contractors can only provide cost estimates.
- DIY VS. Professional Cost of Installing Panic Bars
If you choose to install panic bars yourself, you can save on labor costs but must consider the cost of purchasing the panic bars and any tools.
A basic model typically starts around $100 and can go up to several hundred dollars for more advanced options.
On the other hand, the cost of hiring a professional locksmith or security company will ensure proper installation and save you time and effort.
Frequently Asked Questions
How long does it take to install a panic bar?
Simple emergency exit bar installations on standard doors may take less time, possibly around 30 minutes to an hour. However, more complex installations may take longer.
What is the difference between a panic bar and a crash bar?
The ‘panic bar’ is more commonly used in the United States, while the ‘crash bar’ is often used worldwide. Ultimately, they refer to the same type of device.
Can you install a panic bar on any door?
Panic bars can be installed on most types of doors. Still, there are a few factors to consider, like when installing a Stanley panic bar and the door type, door materials, door size, and compliance with local codes.
Are there specific regulations for panic bar replacement?
It’s essential to consult with the building or fire departments to determine the specific regulations and requirements.
How do I know if my commercial space requires panic bars?
Contact the local building department or fire department and inquire about the criteria for panic bars in commercial areas. Consider a high-quality Yale panic bar depending on your needs.
How often should I perform maintenance on my panic bars?
It is advised that the occupier or their authorized representative do regular maintenance inspections at no longer than one-month intervals.
Conclusion
Understanding panic bar installation is essential for ensuring the safety and security of your commercial space. By considering factors such as panic bar types, DIY vs. professional costs, installation steps, and troubleshooting techniques, you can make informed decisions to meet safety standards.
Whether you choose to install panic bars yourself or hire professionals, the key is to prioritize the proper installation and maintenance for the overall safety of your premises.
Read next: List of the most trusted door security bars.

I am the last member to join Revolar and might be just the luckiest to work with dedicated people like Teddy and John. Our team has established a process where my only job is writing the best content to deliver incredible ideas and guides.