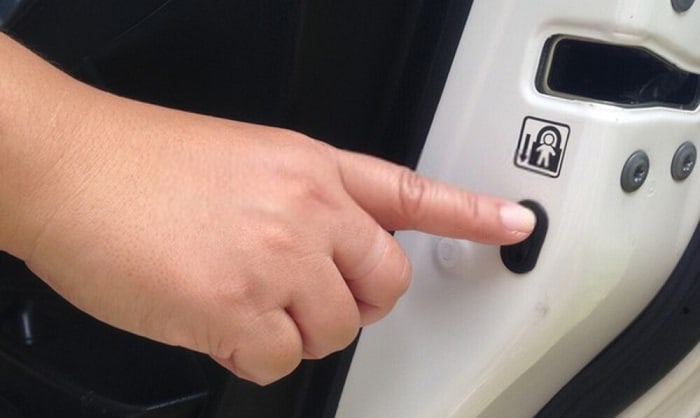
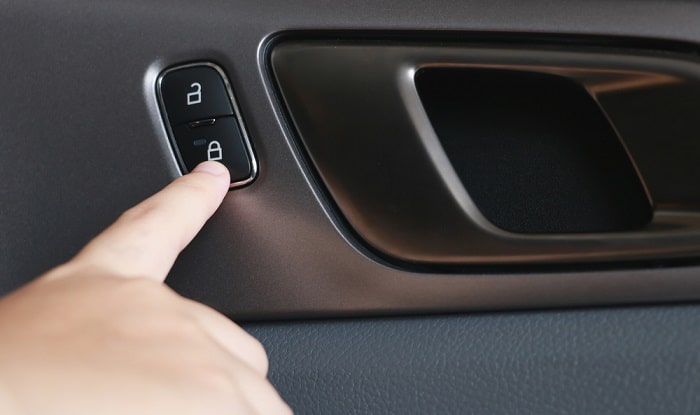
Want to know how to unlock child safety door lock? Take off the plastic cover on the child lock lever. Put a lubricant over the lock lever, making sure that it reaches inside the device. Turn the lock on and off by sliding the switch both sides. Return the plastic cover.
If you have a child safety lock in car, this tutorial will help you unlock and fix it if the child safety lock wont disengage. Just follow the steps carefully and prepare the items needed. You won’t need to call a mechanic to help you unlock the device.
Table of Contents
What You Need
Before you proceed with our tutorial, you need to prepare the items needed to unlock child lock in car. These are simple tools that you can find in your toolbox. In case you don’t have them, you can order online or you can purchase them at the nearest local store. You can also borrow from your friends or neighbors.
1. Flathead screwdriver
You will need a flathead screwdriver to open the plastic cover and access the lock mechanism. A flathead screwdriver has a tip in the shape of a wedge. It is useful for tightening and loosening screws that have straight and linear notch heads. This screwdriver is also one of the most used tools.
When it comes to sizes, you must choose the right size of the screwdriver that will fit the screw head. There are two measurements that must be noted in choosing a flathead screwdriver: the shaft’s length and the head’s width.
The sizes available for a flathead screwdriver are ¼ by 4, 3/16 by 4, ⅛ by 4, 3/16 by 1 ½, and 3/32 by 1 ½. The first number is the width of the screw head while the second number is the shaft length. If it’s only close-up work, you can use a stubby flathead driver.
If you want to have a better grip, you can also use a screwdriver with a longer shaft. Also, if you are not sure what kind of flathead screwdriver you need, you can buy a set. This will help you choose what size of screwdriver is suitable.
2. Lubricant
To slide the switch of the child safety lock, a lubricant is necessary. It is useful in preventing metals from corroding. It also helps in improving the performance of machines, tools, or any kinds of metals. However, lubrication must be applied regularly to keep the good performance of the machine.
For this tutorial, you can use a dry lubricant. This one comes in the form of a spray. It is mixed with other solvents such as water and alcohol that quickly dry up after being applied. Dry lubricants are typically applied on hinges, locks, and rods. The benefit of using this is that it doesn’t attract dirt or dust.
If you don’t have a dry lubricant, you can also use a penetrating lubricant. This is commonly used for rusty bolts or home locks. Although it does not last for a long time, it provides enough lubrication to easily penetrate cracks and break up any rust. If the screw is already rusting, this type of lubricant is the best to use.
Another alternative is an oil lubricant. The weight number of the oil will determine its density. You can also mix some additives if you want it to have anti-corrosion properties.
3. Gloves
A pair of gloves is useful to provide you with a good grip while you are doing the tutorial, especially if your hands are wet or sweaty. There are different kinds of gloves that you can choose from, depending on the type of job you will use them for.
Choose gloves that are reusable since these gloves are for industrial or heavy-duty purposes. They are also thicker compared to disposable gloves, which can provide protection to your hands, especially from cuts and hazardous materials. You can choose from reusable nitrile gloves and reusable latex gloves.
The benefit of using reusable nitrile gloves is that it prevents punctures and provides a comfortable fit. Aside from that, it can resist chemicals and high temperature materials. However, this kind is one of the most expensive reusable gloves.
Another option is the reusable latex gloves. This type is useful in general cleaning. However, it can provide a good and comfortable grip. It is one of the least expensive but it has a minimal resistance, especially to chemicals.
What to Do
Step 1: Take off the plastic cover on the child lock lever
To have access to the lock mechanism of the lock, you need to take off the plastic cover on the child lock lever. You will need a flathead screwdriver to remove the cover. Once done, you will see a large hole that will give you access to the lock mechanism.
Step 2: Put a lubricant all over the lock lever then turn the lock on and off
You have to put lubricant all over the lock lever. Make sure that it reaches inside the lock device so that you can slide the lock and unlock it. Once you are done, look for the switch of the child lock device. It can usually be seen below the latch, at the external edge of the car door.
To loosen the child safety door lock, you have to turn the switch on and off about 25 times then reset the lock. You can also do these steps to the other doors of your car that are stuck and don’t disengage properly.
Step 3: Return the plastic cover
After you have successfully unlocked the child safety door lock, you can now return the cover of the lock mechanism. Try to drive your car to see if there is still a problem with the lock mechanism. If there is, just do the process all over again but you have to force down the lever by putting a tape on it.
Conclusion
Are you satisfied with our tutorial on how to unlock child safety door lock? By following each step carefully, you can unlock the lock and, at the same time, fix it temporarily. You don’t have to call a mechanic in case you are having difficulty opening the lock.
If you find this article helpful, you can also share it with your friends who are struggling to open their child safety door lock. We will also love to hear from you. You are free to share your experiences while doing the tutorial. Just leave a comment below.

I am the last member to join Revolar and might be just the luckiest to work with dedicated people like Teddy and John. Our team has established a process where my only job is writing the best content to deliver incredible ideas and guides.


