
Want to learn how to install a sliding barn door lock? Drill the required holes and secure the backplate of the lock to the door jamb with screws. Attach the front plate. After that, install the rectangular plate and secure it with screws.
Throughout the tutorial, you will be guided on how to install a barn door. You will be able to lock a sliding barn door from the outside and keep your privacy from visitors or family members. You only need to follow the steps and prepare the required items. You may also ask for help from a family member.
Table of Contents
What You Needed
Before you can have a sliding barn door with lock, you need to prepare specific items. You can purchase some of them at the store near you or you can also borrow from your neighbors. These items are easy to find and they are very affordable.
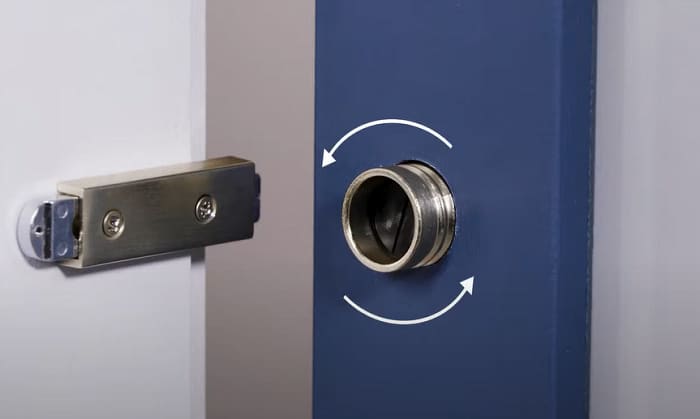
1. Teardrop lock set
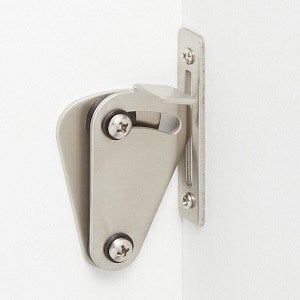
A teardrop lock is a sliding barn door locking hardware specifically designed for sliding doors in bathrooms and bedrooms. It helps in adding privacy to the house by swiveling into a slot installed on the door to hold it in place. The sliding barn door latch is also used for wall-mounted sliding doors, pocket doors (Find out more locks specially designed for pocket doors here), and single sliding.
The parts that you will see on a teardrop lockset are the teardrop swivel, teardrop backplate, strike plate, washers, and screws. To ensure durability, you can choose a teardrop lock that is made of stainless steel. The colors are usually available in silver and black. Pick a color that will complement your door so that it won’t look too distracting.
2. Drill and drill bit

A drill is a tool that creates holes through the use of drill bits. You can choose a drill driver for this tutorial. It simply rotates clockwise and counterclockwise no matter how big it is or how much voltage is exerted. You can choose from a corded or cordless drill driver.
Usually, a cordless driver is used when working with metal, plastic, and wood materials. It includes a drill clutch that will allow you to control the power you want to exert while you are driving the screws. The power will depend on how large the hole is. The advantage of a cordless driver is that you can move freely.
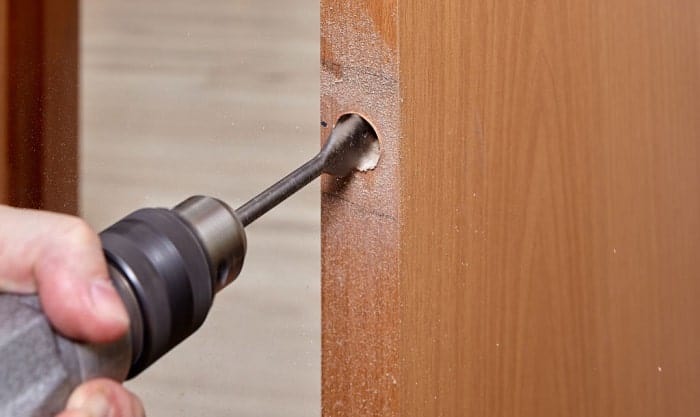
In terms of drill bit, you can use a spade or flat wood bit since it would enable you to drill through the wood. The available sizes are ¼ inch to 1 ½ inch. You will determine the size of the bit you need by the size of the hole you will create. The only disadvantage of this bit is that it produces splintering when the pressure is too much.
3. Screwdriver
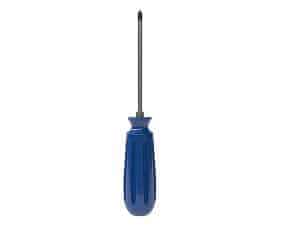
Since you would be dealing with screws, you need to have an appropriate screwdriver. Typically, the screws are already included in the lockset. Look at the screw head to know what screwdriver you need.
If the screw head is cross-shaped, you need to use a Phillipps screwdriver. Make sure that the screwdriver fits the screws perfectly. If the screwdriver is too small, then the screws would loosen and it would be impossible for you to drive them. If it is too tight, you might damage the screws.
When the screw has a slotted head, use a flat-head screwdriver. Its tip is flat and in a wedge shape that is useful for loosening and tightening linear notch screws. You need to have a flat-head screwdriver that fits perfectly so it won’t slip out of the screw slot. If the screw slot is larger, you will need a screwdriver that has a thicker tip.
4. Punch tool and hammer
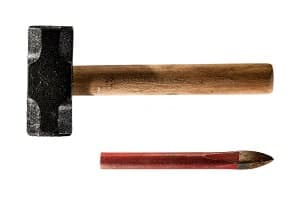
A punch tool is a small piece of metal that has a sharp point on one end and has a larger tip on the other side. It is commonly used for woodworking projects to puncture pilot holes. There are two types of punch tools — the hollow and solid punch tools. In this tutorial, you will need a special type of punch called the center punch tool.
The center punch tool is specifically used for drilling because it creates shallow indents. Before trying to drill the holes, you must first mark the area where the holes will be located. By driving the punch tool, you will create a recess that will prevent the drill from veering off as it digs to the wood.
If you are wondering what kind of variant to choose, use a prick punch tool. It has a thinner and sharper tip that will help you to create deeper pilot holes. You must use this as you prepare for drilling.
To drive the punch tool, you will need a ball-peen hammer. Its flat face is useful in executing techniques, especially in a workshop. The sizes and weights of the hammer may vary, but you can use a lighter one. It is also available in hardware stores.
5. Safety Goggles

As a precautionary measure, you must use safety goggles to protect your eyes from flying objects while you are drilling the wood. Shrapnel can cause discomfort to your eyes or a temporary loss of your vision. You can wear goggles that are made of plastic. You can also put scotch tape to the ventilating holes to prevent the dust from coming in.
When choosing a pair of safety goggles, make sure that it fits you so you won’t get distracted while you are drilling. If it is too loose, it might fall and cause more accidents. If it is too tight, you will be uncomfortable doing all the procedures.
What to Do
Step 1: Drill the required holes and secure the backplate of the sliding barn door lock to the door jamb with screws
If the teardrop lock has a template, put it on the door jamb and mark the spots where you must drill the holes. After that, make pilot holes using a punch to prevent the drill from slipping. Once done, drill the holes. Attach the backplate of the sliding barn door lock to the door jamb with screws using the screwdriver.
Step 2: Attach the front plate
Once the backplate is intact, you can now attach the front plate. If your barn door is outside of the door frame and it is too far for the lock to reach, you can make some modifications. You may attach the front plate in a way that the lock can swing to the door.
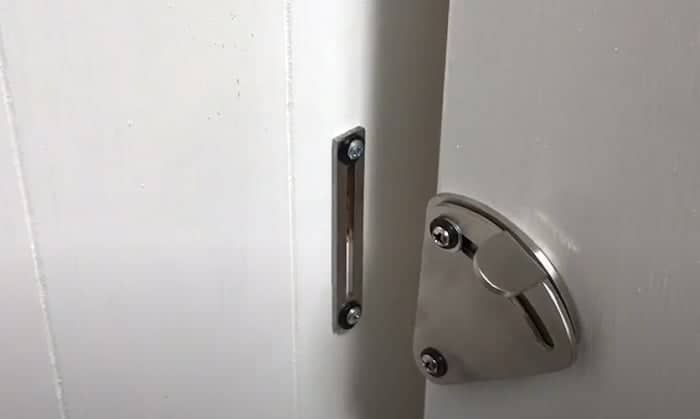
Step 3: Install the rectangular plate and secure it with screws
You can now install the rectangular plate and secure it with the two screws that are included in the lockset. If you want to open the door during emergencies, you can use a pen or a credit card to flip up the latch. This is the solution so you won’t get trapped inside your bathroom or your bedroom.
In addition, if you own several types of sliding doors, you can find out some more reviews about the top-rated sliding glass door locks and the most popular sliding closet door locks.
Conclusion
Have you enjoyed our tutorial on how to install a sliding barn door lock? You will improve the privacy in your bedroom or bathroom by installing a teardrop lock in your barn door. The steps are also easy to follow so that you won’t need any professional help to add privacy inside your house.
If you think that the article is useful, you can share this post. Also, you can tell us what locks for sliding barn doors you think are best in improving privacy and adding security to the house. Just leave a comment below.
Read next:

I am the last member to join Revolar and might be just the luckiest to work with dedicated people like Teddy and John. Our team has established a process where my only job is writing the best content to deliver incredible ideas and guides.