
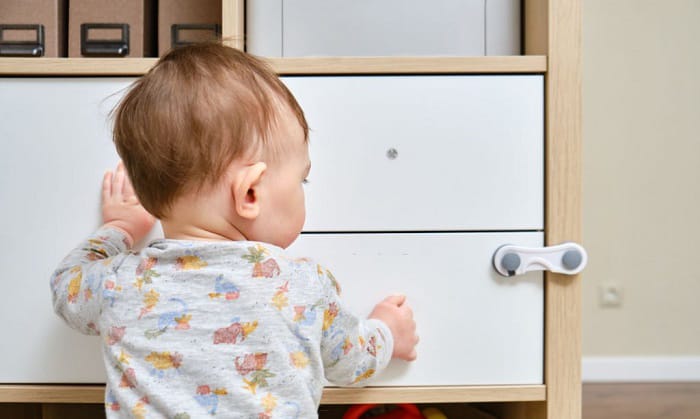
Being a parent is already an exhausting job. But what more if you have an active child who loves exploring your cabinets?
Thankfully, Safety 1st cabinet locks offer excellent security to have your kid further explore their curiosity and playfulness while being safe. With these devices, harmful cleaning supplies and sharp kitchen tools are finally out of their reach.
Beat the stress brought to you by your little ones by following these instructions on how to install safety first cabinet locks.
Table of Contents
How to Install the Safety 1st Adhesive Cabinet Latch?
What to prepare
- Safety 1st adhesive cabinet latch
- Safety first cabinet lock magnetic.
- Marker
- Screwdriver and driller (optional)
Step 1. Clean the surface of the cabinet or drawer
No matter how solid and well-suited the adhesive is for the job, a surface full of dust will more likely bring you trouble in the long run.
So clean the surface of your cabinet or drawer before diving into the actual safety 1st adhesive cabinet latch installation.
This way, the adhesive is at its maximum bonding capacity. Your lock will adhere longer to your cabinet or drawer door, even without screws.
Step 2. Assemble the latch and catch
The safety latches for drawers packages usually have a pre-positioned catch and latch for easy installation.
But don’t fret if yours came disassembled because putting the two parts together is just a piece of cake.
- Differentiate the catch from the latch. The catch is a flat and small plate of plastic that has two teeth on it, while the latch is the one that has a hook.
- Locate the latch’s wing and catch’s teeth. The catch’s teeth are the embossed portion of the catch, while the latch wings are the folded part at the side edge of the latch’s plate.
- Slide the catch’s teeth onto the latch’s wings.
Assembling these two parts will make the lock installation much faster and easier because the latch lines up perfectly with the catch.
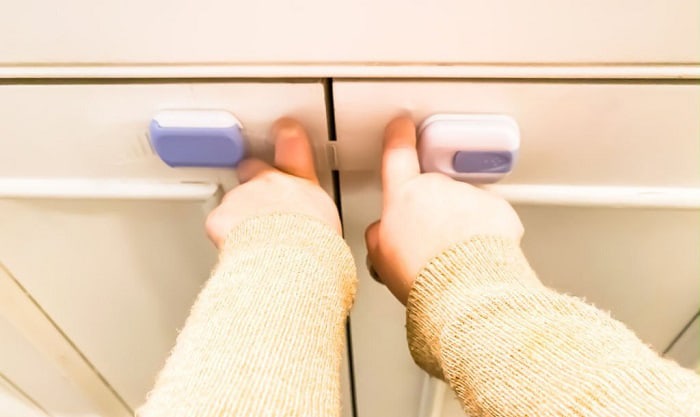
Step 3. Attach the catch and latch onto the cabinet
After you attach the two parts, make a mental note of where to position the adhesive cabinet and drawer latches. Ideally, it should touch the door by putting it on edge and must be 1 inch from the corner.
- Peel the adhesive cover in the catch.
- Paste it underneath the top of the cabinet or drawer section.
- Press for 30 seconds to set the adhesive.
- For the latch, the adhesive cover must touch the door.
- Peel the adhesive cover and close the door.
- Press the door for 30 seconds.
- Open the door to detach the latch from the catch.
- Pull the latch’s wings down.
Step 4. Rotate the latch to activate the lock
You may be confused why the child safety cabinet locks are still open even after the installation.
It’s because the locks are not yet activated.
In the latch arm is the unlock/lock logo. The locks are not yet activated if you see a red ‘unlock’ logo.
Rotate the latch’s arm until the hook faces upward or the catch to enable the locking system.
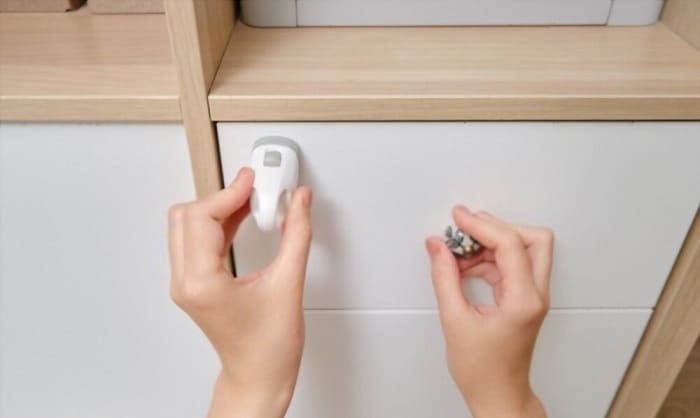
Step 5. Screw the catch and latch on (optional)
If you have a strong toddler that can knock down the adhesive from the lock, you might want to take additional protective measures by screwing your cabinet & drawer locks.
- Make a drill guide by marking your drill bit the same size as the provided screws.
- Using the guide, drill the pilot holes on the latch and catch.
- Secure your lock using the provided screws.
How to Install the Safety 1st Adhesive Magnetic Lock System?
Step 1. Assemble the template and the catch
For accurate installation, safety first cabinet lock magnetic packages have a yellow template that will guide you on where to align the magnetic device.
To assemble, you need to slide the teeth of the yellow template onto the catch through its two holes. After putting the two together, attach them to the cabinet or drawer and the door.
- Peel the adhesive cover of the catch and stick it to the edge underneath the cabinet. The adhesive of the template must face outside.
- Remove the yellow template adhesive cover and close the door to stick it. Press it for 30 seconds.
Like the adhesive cabinet latch, a dust-free and clean surface for adhering ensures the longevity of the bond.
Step 2. Attach the magnetic lock
In attaching the magnetic cabinet locks, you must locate the two-line guide at the top of the device. Remember that’s where the yellow template must sit to align the magnetic lock’s lever and the catch perfectly.
To attach the magnetic lock to the door, remove its adhesive cover and slide the magnetic lock under the yellow template. Press it to the surface for 30 seconds to set the adhesive.
Step 3. Activate the lock
Like the adhesive latch, this magnetic lock requires ‘activation’ to use the locking system. But it is not complicated, unlike the ‘about to install spring loaded locks’ situation.
- Remove the yellow template that sits atop it by pulling it up.
- To activate the lock, click the button at the middle part of the lock to show the lever. The red ‘unlock’ will turn into a green ‘lock’ logo.
- Get the magnetic key included in the package and check if the lever goes down once the key touches the other side of the door.
If you want to bind the parts to the cabinet more safely, you can drill the pilot holes using the provided screws.
Related post:
FAQs
Are the adhesives of these locks durable?
These safety 1st adhesive locks have 3M VHB tape, guaranteeing the most robust binding between the surface and the lock devices. Additionally, allow the adhesive to rest for 24 hours to match heavy duty drawer latches and locks.
Can I still remove it?
Yes, you can remove safety 1st adhesive cabinet locks using the hair-blower method. Through this, the adhesive will dry out, and the spoon-scraping will finish the safety first cabinet lock removal.
Can I use these locks to childproof my whole house?
Although these locks are effective in keeping the cabinet and drawers free from your kids, these locks are not enough to cover the safety of the whole house.
However, you can use the safety 1st essentials childproofing kit, which secures various dangerous areas like eclectic plugs. Moreover, you can purchase it in retail in 7 pack, etc.
Conclusion
Despite the stress and anxiety of imagining your child playing and exploring their curiosity, it is still best for babies to do these activities to support and encourage their development.
Fortunately, safety 1st locks help us eliminate the foreseeable threats that cage inside your cabinets and drawers. You can now support your little one while minimizing the terror by following these steps on how to install safety first cabinet locks.

I am the last member to join Revolar and might be just the luckiest to work with dedicated people like Teddy and John. Our team has established a process where my only job is writing the best content to deliver incredible ideas and guides.